Avoiding Mistakes in Vinyl Record Cleaning - HiFi.Fan Article
Avoiding Mistakes in Vinyl Record Cleaning
By HiFi Editorial24 February 2026
Key Highlights
A multi-stage cleaning process—pre-rinse, deep cleaning, and final rinse—is key to effectively removing contaminants without residue buildup.
Ultrasonic cleaners, like Humminguru and Degritter, offer superior deep cleaning, but temperature control is critical to avoid record warping.
DIY solutions, such as diluted isopropyl alcohol mixes and baby scalp brushes, provide budget-friendly alternatives to commercial products.
Cleaning vinyl records can be a delicate art, and getting it wrong often makes the problem worse instead of better. Many of us have been in the frustrating position of thinking we’ve cleaned a record only to find our stylus dragging gunk out of the grooves and requiring constant cleaning during playback. The key lies in understanding the right techniques and tools to effectively clean without introducing new issues.
The common “spray-and-wipe” method is a quick fix that often loosens dirt but fails to remove it completely. This approach leaves residue in the grooves, which is then picked up by the stylus, resulting in distortion and repeated needle cleaning. Advanced stylus profiles, like microline or Shibata, exacerbate the issue since they reach deeper into the grooves, where debris tends to accumulate.
The Importance of a Multi-Stage Cleaning Process
A reliable vinyl cleaning method involves multiple stages to ensure all contaminants are removed:
Pre-Rinse
Start by flushing the record with distilled water to loosen surface debris. This step prevents hard particles from scratching the vinyl when you proceed to deeper cleaning.
Deep Cleaning
Use a specialized cleaning solution paired with a manual cleaning system like a Spin-Clean or a vacuum-based unit such as the Okki Nokki. These tools ensure that the loosened dirt is physically removed, rather than just being smeared around the record's surface. Always avoid letting cleaning solutions dry on the record, as they can leave residues that are difficult to remove later.
Final Rinse
Rinse thoroughly with distilled water to wash away any remaining cleaning solution or loosened particles. Skipping this step is a common mistake that often leads to the very buildup you’re trying to prevent.
The Ultrasonic Advantage
Ultrasonic record cleaners have become a gold standard for vinyl enthusiasts due to their ability to clean deeply and efficiently. Machines like the Humminguru and Degritter use cavitation—the formation and implosion of microscopic bubbles—to dislodge dirt from deep within the grooves. While the Humminguru is more budget-friendly, the Degritter’s 120kHz frequency and powerful design provide an unparalleled level of cleaning efficiency.
For those going the ultrasonic route, it’s crucial to monitor water temperature, as excessive heat can warp records. Ideally, keep the bath between 30°C and 40°C and consider cooling the water between batches with ice packs if necessary.
DIY and Budget-Friendly Alternatives
If investing in high-end equipment isn’t feasible, there are effective DIY approaches:
Cleaning Solutions: A mix of distilled water, isopropyl alcohol (20%), and a few drops of Jet Dry or dish soap can create a cost-effective cleaning solution. Ensure the alcohol content is below 25% to avoid damaging the vinyl.
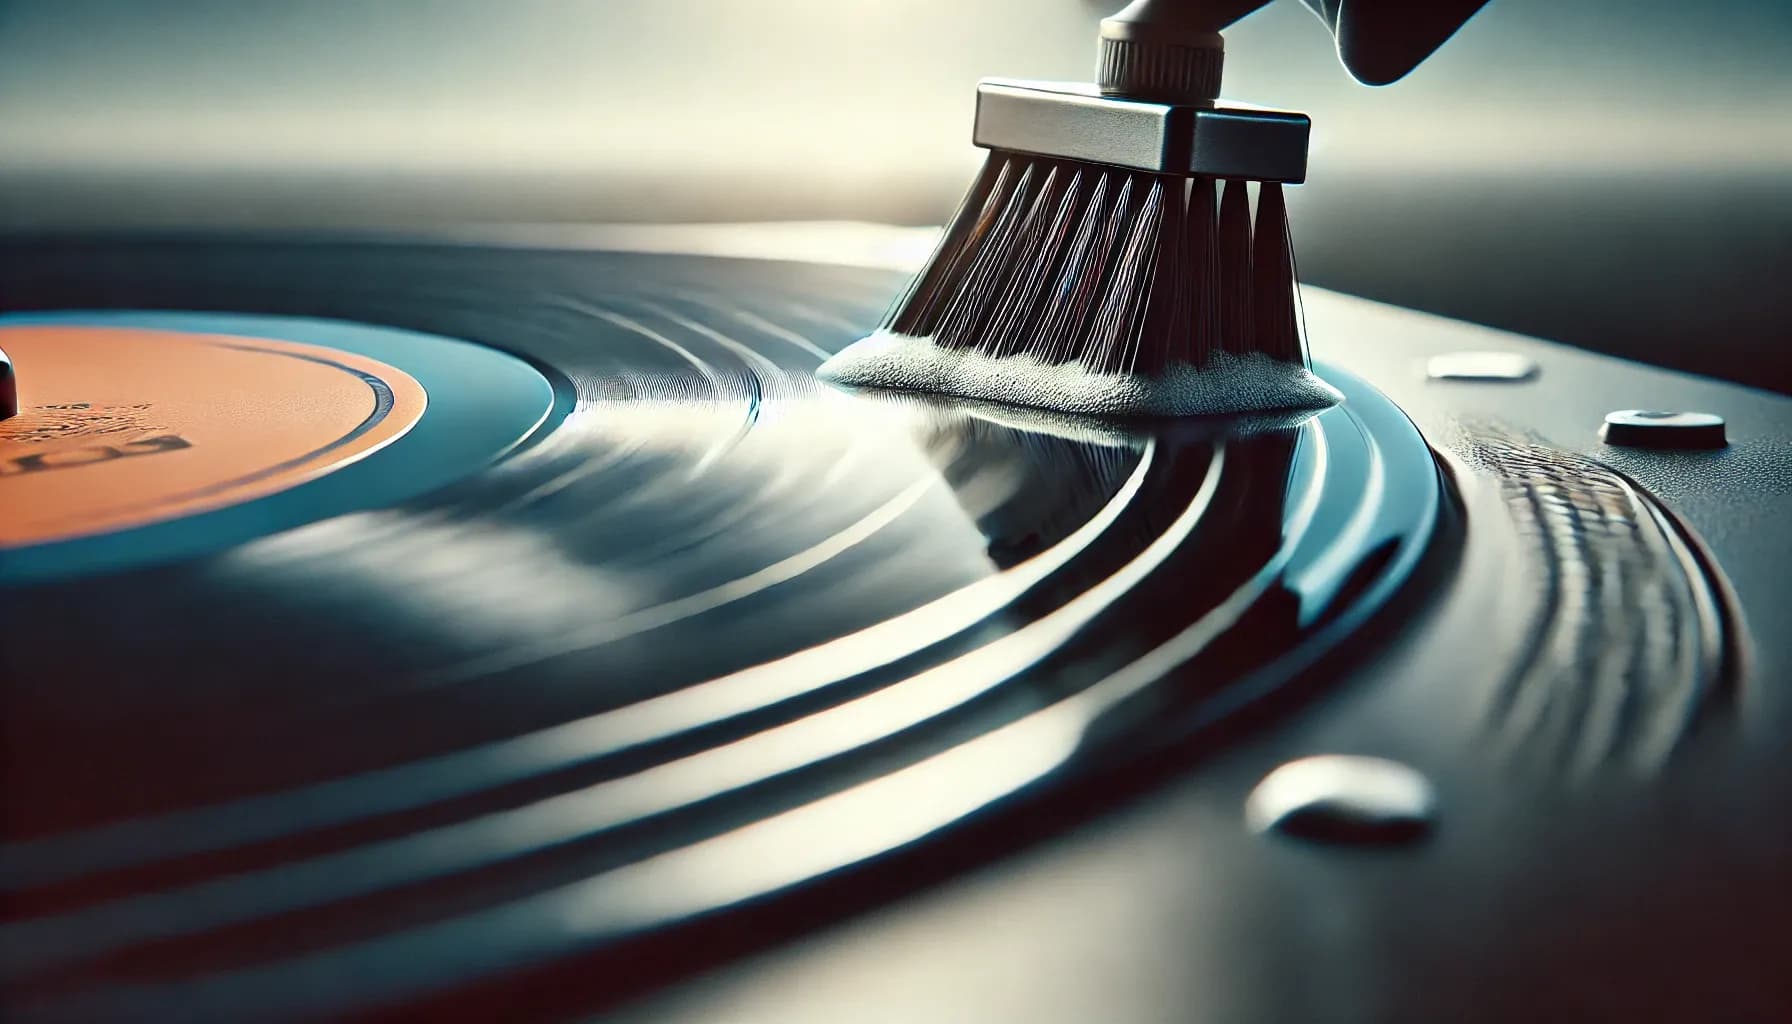
Brushes: Baby scalp brushes and carbon fiber brushes can be used for manual scrubbing, followed by a distilled water rinse. Be sure to scrub lightly and in the direction of the grooves to avoid damage.
Label Protection: A label protector, such as those used with sink-based cleaning methods, ensures that cleaning solutions don’t damage or discolor the record labels.
Maintenance and Stylus Care
Even with perfectly cleaned records, the stylus requires regular maintenance to perform optimally. Tools like the Onzow Zerodust or carbon fiber stylus brushes are effective for gently removing debris. For those who want an extra layer of care, ultrasonic stylus cleaners are available to keep the needle spotless.
Avoiding Common Pitfalls
Many cleaning methods fail due to skipped steps or improper techniques. For example, using tap water for rinsing can leave mineral deposits in the grooves, while neglecting to rinse cleaning solutions entirely can lead to residue buildup. Similarly, using brushes or cloths on a dry record can grind dirt into the surface, causing permanent damage.
Static electricity is another challenge for vinyl playback. A tool like the Zerostat can neutralize static charges that attract dust and debris, further extending the time between cleanings.
Long-Term Care for Clean Records
Once a record is properly cleaned, it’s essential to store it correctly to maintain its condition. Use anti-static inner sleeves and protective outer jackets to shield records from dust and contaminants. Always handle records by the edges to avoid transferring oils or dirt from your fingers onto the grooves.
With the right techniques and a little patience, even records that seem beyond hope can be transformed into excellent listening experiences. Whether you’re diving into ultrasonic cleaning or sticking to a more hands-on approach, the investment of time and care will pay off in sound quality and the longevity of your collection.